Most small tears and holes in a puffer jacket are easy to fix at home. To repair down jacket holes, you need a self-adhesive repair patch, an alcohol wipe, and about five minutes. The same method works on down and synthetic jackets, and it stops the insulation from escaping.
Bigger rips, split seams and broken zips take more work. You can sew a down jacket, but it’s harder than it looks on a thin shell, and a repair service is usually the better option for anything beyond a small tear.
This guide covers what you need, how to patch a tear step by step, how to stop feathers coming out, whether a jacket can be refilled, and when it’s time to repair or replace.
Thanks for your support – I may earn a small commission from affiliate links in this article Learn more
The Short Answer
- Tears and holes up to 5cm (2in): Clean the area, then stick on a self-adhesive patch with rounded corners that overlaps the tear by at least 12mm (½in) all round
- Feathers poking through: Pull them back in from the inside. Don’t pull them out
- Split seams, big rips and broken zips: Send it to a repair service
- After the repair: Leave the patch for 24 hours before you wash the jacket
What You Need
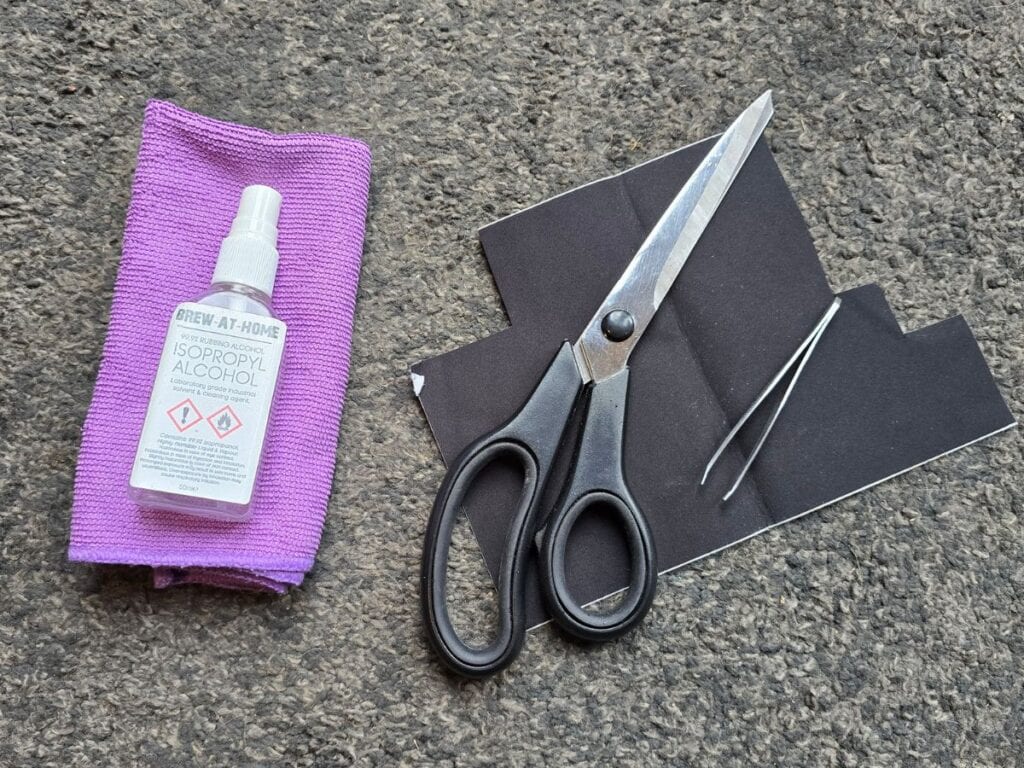
- A self-adhesive repair patch: In a colour that matches the jacket, or clear (see below)
- An isopropyl alcohol wipe: Or rubbing alcohol on a clean cloth, to clean the fabric so the patch sticks
- Sharp scissors: For cutting the patch and trimming loose threads
- Tweezers or masking tape: For coaxing loose down back into the jacket
Which Down Jacket Repair Patch Should You Use?
A thin, flexible nylon patch with a peel-off backing is the best option for most puffer jackets. Gear Aid Tenacious Tape is the best-known, and it comes as pre-cut patches or a roll you cut to size. Outdoor brands such as Rab also sell their own down jacket repair patches.
- Pre-cut patches: Quickest, and already rounded
- A roll: Better value for larger tears or for keeping some in your pack
- Duct tape: Fine as a temporary fix on a trip, but it peels and leaves residue, so swap it for a repair patch when you get home
Repair your gear
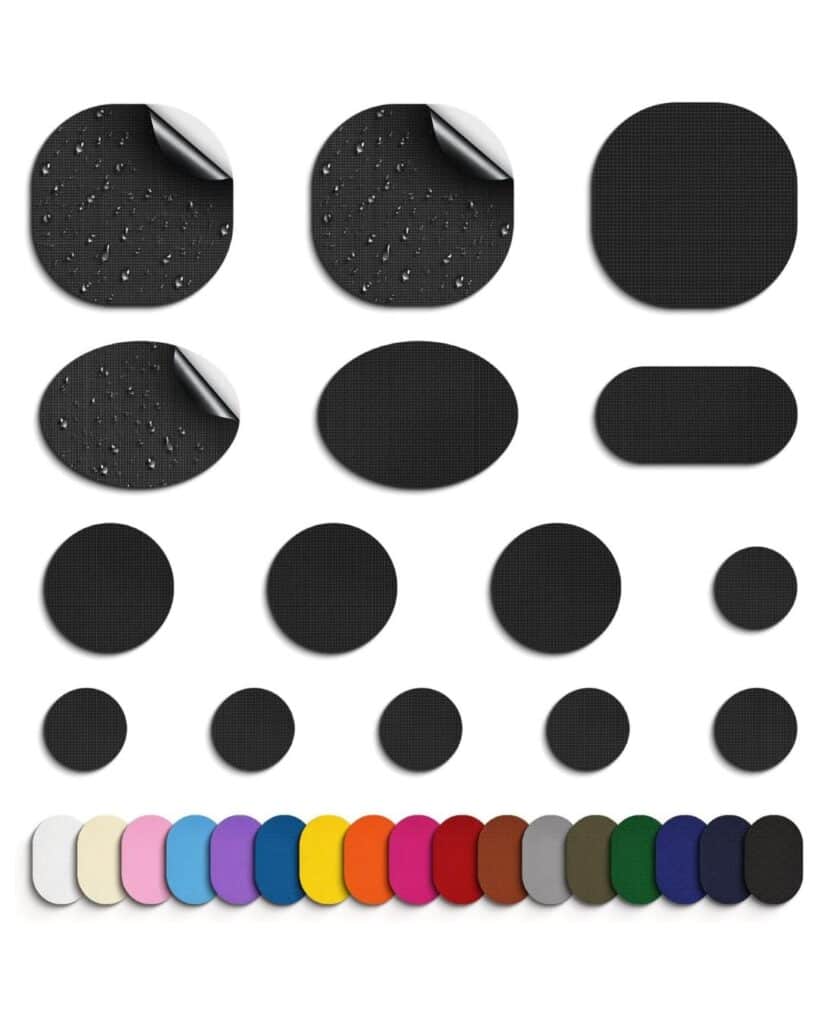
DOWN JACKET REPAIR PATCHES
From £6
Self-adhesive nylon patches for tears and holes in down and synthetic jackets. They come in round and oval shapes, so there are no square corners to lift and peel.
How to Repair Down Jacket Holes and Small Tears
Patch the tear as soon as you notice it. The longer you leave it, the more down you lose and the more grit works into the edges, which makes the patch harder to stick.
- Push the down back in. Pinch any down poking out of the tear and push it back into the baffle. Tweezers help, or wrap masking tape around a finger, sticky side out, and dab the tear to pick up loose bits.
- Trim loose threads. Snip off frayed threads around the tear. Don’t cut the fabric itself.
- Clean the area. Wipe an area slightly bigger than your patch with an alcohol wipe to remove dirt and grease, then let it dry completely.
- Cut the patch to size. It needs to overlap the tear by at least 12mm (½in) in every direction. Round the corners, as square corners catch and lift first. A circle is best on a small hole.
- Line it up. Avoid laying the patch across the jacket’s stitch lines if you can, as it won’t bond as well over the ridge.
- Peel and stick. Remove the backing and press the patch down from the centre outwards to push out any air bubbles. Run the back of a fingernail around the edges so they sit flat.
- Patch the lining too if the tear goes through. If the inner lining is also torn, repeat the steps on the inside.
- Leave it to bond. Most self-adhesive patches reach full strength after 24 hours. Don’t wash the jacket until then.
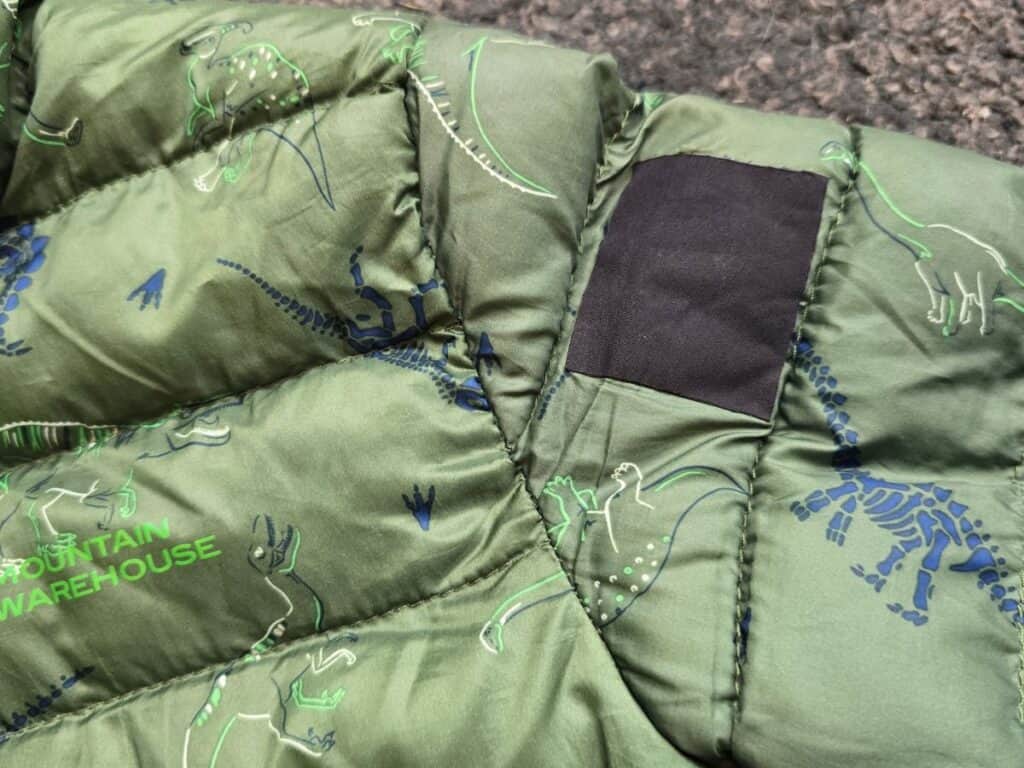
For patches on high-wear spots such as cuffs, Gear Aid say a little heat helps the bond, for example from a hair dryer. Check the care label first, and keep the heat low on a thin shell.
I’ve lost count of the repairs I’ve done on my kids’ puffer jackets over the past few years, and each one has been quick and easy. The one mistake I made early on was cutting square patches. Over time, they peeled back from the corners, so I now always cut curved edges.

If the jacket needs a clean after the repair, my guide to washing a puffer jacket covers the products, settings, and drying. Give the patch its 24 hours first.
How Do You Stop Down Jacket Feathers Coming Out?
Pull them back in from the inside rather than pulling them out. A few feathers working through the fabric or the seams is normal for a down jacket, especially one with a higher feather content, and it doesn’t mean the jacket is damaged.
- Grab the feather from the other side. Pinch the fabric around the base of the feather, from the inside of the baffle, and draw it back through the shell.
- Close the hole. Rub the fabric between your fingers. Rab suggest wetting your fingertips first, which helps the weave close over the tiny hole.
Pulling a feather out from the outside makes the hole slightly bigger each time, so more down follows it.
If down keeps escaping from the same spot, there’s probably a small hole or a snag. Patch it in the same way as a tear. If it’s coming steadily from a seam, the stitching has likely failed, and that needs a sewn repair.
Synthetic jackets don’t leak in the same way, as the fill is usually a sheet rather than loose clusters. A torn synthetic jacket is patched in exactly the same way, though. If you’re not sure which type you have, the care label will say, and my down vs synthetic insulation guide explains the differences.
Can You Sew a Down Jacket?
You can, but only sew where you have to, such as a seam that has come apart. Every needle hole is another way out for the down, and stitching through the shell and lining together squashes the insulation and creates a cold spot.
If you do sew a split seam, use a fine needle and matching polyester thread, follow the original stitch line, and keep the stitches small so they don’t pucker the fabric.
For torn baffles, long rips or a broken zip, a repair service will do a neater and stronger job than most of us can at home.
Where Can You Get a Down Jacket Repaired?
Start with the brand. Many outdoor brands run their own repair service, so check the warranty and the brand’s website before you pay anyone else. Rab, for example, repair their jackets through the Rab Service Centre.
If the brand doesn’t offer repairs, independent outdoor gear repairers can patch, re-sew seams and replace zips on any make. In the UK, Alpkit run a repair service that patches down and synthetic jackets, with a heat-applied patch for tears of 5cm (2in) or less and a sewn patch for anything bigger.
For a broken zip, a local clothing repair or alterations shop is worth trying too. When the zip broke on one of my jackets, a local repair shop replaced it for me, which saved posting it away.
Can down jackets be refilled? Yes, some repairers can open a baffle and top up down lost through a big tear. It isn’t a job to try at home, so ask whether they offer it before you send the jacket off.
Should You Repair or Replace a Down Jacket?
Repair it in most cases. Small tears, holes, split seams and broken zips are all fixable, and a patch costs far less than a new jacket.
Replacing it makes more sense when:
- The shell is failing in lots of places, not just one tear
- The down stays flat and lumpy after a wash and a thorough tumble dry, which suggests it has broken down or a lot has been lost
- The repair quote is close to the cost of a new jacket, which can happen with cheaper jackets and big repairs
If you do replace it, a ripstop shell is worth looking for, as the grid of thicker threads helps stop small tears spreading. The OEX Kintra down jacket I reviewed has a ripstop shell and has come through a year of dog walks, winter hikes and wild camping without a tear. My best insulated jackets roundup covers more options for UK weather.
Final Thoughts
A small tear isn’t a reason to replace a puffer jacket. A self-adhesive patch takes a few minutes, costs very little and stops the down escaping, as long as you clean the fabric first and round the corners.
Keep a couple of patches in your pack so you can fix a snag on the spot. Leave anything bigger, such as a split seam or broken zip, to the brand or a repair service.
Repair your gear
DOWN JACKET REPAIR PATCHES
From £6
Self-adhesive nylon patches for tears and holes in down and synthetic jackets. They come in round and oval shapes, so there are no square corners to lift and peel.
Related Guides & Reviews
These guides and reviews cover choosing and looking after an insulated jacket.
- How to Wash a Puffer Jacket (Down and Synthetic)
- Down vs Synthetic Insulation: Which Jacket Should You Buy?
- Best Insulated Jackets for UK Weather
- OEX Kintra Hooded Down Jacket Review
- Mountain Warehouse Seasons Padded Jacket Review

Steve Cleverdon
Adventure-driven outdoor gear reviewer and paddleboarder, Steve has spent 20 years exploring rivers, coastlines, and trails across Britain and abroad, sharing what he’s learned along the way. Learn more about Steve or get in touch.